Ingress란?
클러스터 내의 서비스에 대한 외부 접근을 관리하는 API 오브젝트이며, 일반적으로 HTTP를 관리함.
인그레스는 부하 분산(L7 Switch 로드밸런싱), SSL 종료, 명칭 기반의 가상 호스팅을 제공할 수 있다.
인그레스는 클러스터 외부에서 클러스터 내부 서비스로 HTTP와 HTTPS 경로를 노출한다. 트래픽 라우팅은 인그레스 리소스에 정의된 규칙에 의해 컨트롤된다.

Ingress
Ingress 실습을 위한 인프라 세팅
# master1에 git 설치
yum install -y git

# git에서 ingress를 쓰기위한 파일을 가져온다.
git clone https://github.com/hali-linux/_Book_k8sInfra.git

# 가져온 yaml파일 적용
kubectl apply -f /root/_Book_k8sInfra/ch3/3.3.2/ingress-nginx.yaml

# 생성된 파드 확인 ('-n': namespace)
kubectl get pods -n ingress-nginx
## docker에서
# 실습용 폴더 생성 후 이동
mkdir test-home && cd $_

## test-home에 index.html과 images 업로드
## 업로드한 index.hmtl의 배경색과 h1태그 변경 (home)

# tar 파일로 묶기
tar cvf food.tar index.html images

# 도커 데몬 수정
vi /etc/docker/daemon.json
//
{ "insecure-registries":["192.168.1.158:5000"] }
//

# 도커 재시작
systemctl restart docker

# 도커에서 이미지 가져오기
docker pull 192.168.1.158:5000/nginx:latest

# 도커파일 생성
vi Dockerfile
//
FROM nginx:latest
ADD food.tar /usr/share/nginx/html
CMD ["nginx", "-g", "daemon off;"]
//

# 도커파일 빌드
docker build -t 192.168.1.158:5000/test-home:v1.0 .

# 이미지 전송
docker push 192.168.1.158:5000/test-home:v1.0

# 컨테이너를 만들어서 이미지 확인
docker run -d -p 80:80 --name test-home 192.168.1.158:5000/test-home:v1.0


# 웹페이지 수정 (sales)
vi index.html
//
배경색: green, h1태그: sales-deploy
//

# tar파일 생성
tar cvf sales.tar images index.html

# 도커파일 수정
vi Dockerfile
//
FROM nginx:latest
ADD sales.tar /usr/share/nginx/html
CMD ["nginx", "-g", "daemon off;"]
//

# 도커파일 빌드
docker build -t 192.168.1.158:5000/test-home:v2.0

# 도커 전송
docker push 192.168.1.158:5000/test-home:v2.0
# index파일 수정 (home)
vi index.html
//
배경: pink, h1태그:home-deploy
//
# tar 파일 생성
tar cvf home.tar images index.html
# 도커파일 수정
vi Dockerfile
//
FROM nginx:latest
ADD home.tar /usr/share/nginx/html
CMD ["nginx", "-g", "daemon off;"]
//
# 도커파일 빌드
docker build -t 192.168.1.158:5000/test-home:v0.0 .
# 도커 전송
docker push 192.168.1.158:5000/test-home:v0.0
## 다시 master1
# 폴더 생성 후 이동
mkdir ingress && cd $_
# ingress-deploy.yaml 생성
vi ingress-deploy.yaml
//
apiVersion: apps/v1
kind: Deployment
metadata:
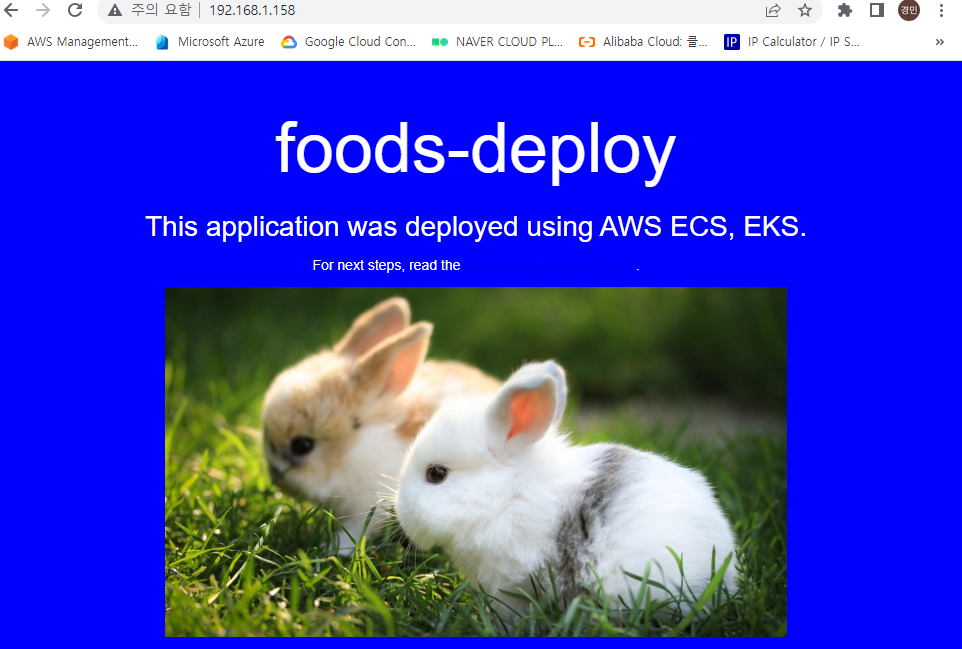
name: foods-deploy
spec:
replicas: 1
selector:
matchLabels:
app: foods-deploy
template:
metadata:
labels:
app: foods-deploy
spec:
containers:
- name: foods-deploy
image: 192.168.1.158:5000/test-home:v1.0
---
apiVersion: v1
kind: Service
metadata:
name: foods-svc
spec:
type: ClusterIP
selector:
app: foods-deploy
ports:
- protocol: TCP
port: 80
targetPort: 80
---
apiVersion: apps/v1
kind: Deployment
metadata:
name: sales-deploy
spec:
replicas: 1
selector:
matchLabels:
app: sales-deploy
template:
metadata:
labels:
app: sales-deploy
spec:
containers:
- name: sales-deploy
image: 192.168.1.158:5000/test-home:v2.0
---
apiVersion: v1
kind: Service
metadata:
name: sales-svc
spec:
type: ClusterIP
selector:
app: sales-deploy
ports:
- protocol: TCP
port: 80
targetPort: 80
---
apiVersion: apps/v1
kind: Deployment
metadata:
name: home-deploy
spec:
replicas: 1
selector:
matchLabels:
app: home-deploy
template:
metadata:
labels:
app: home-deploy
spec:
containers:
- name: home-deploy
image: 192.168.1.158:5000/test-home:v0.0
---
apiVersion: v1
kind: Service
metadata:
name: home-svc
spec:
type: ClusterIP
selector:
app: home-deploy
ports:
- protocol: TCP
port: 80
targetPort: 80
//
# kubectl apply -f ingress-deploy.yamlIngress 사용
# ingress-config.yaml 생성
vi ingress-config.yaml
//
apiVersion: networking.k8s.io/v1beta1
kind: Ingress
metadata:
  name: ingress-nginx
  annotations:
    nginx.ingress.kubernetes.io/rewrite-target: /		# rewrite: redirect 경로 재설정
spec:
  rules:	# 라우팅 규칙
  - http:
      paths:
      - path: /foods			# http 주소 경로에 '/foods'가 있다면
        backend:
          serviceName: foods-svc	# food-svc라벨인 서비스로 80포트 연결
          servicePort: 80
      - path: /sales
        backend:
          serviceName: sales-svc
          servicePort: 80
      - path:					# 아무 경로도 없는 경우
        backend:
          serviceName: home-svc
          servicePort: 80
//

# kubectl apply -f ingress-config.yaml
# kubectl get ingress ingress-nginx
# kubectl describe ingress ingress-nginx


# ingress-service.yaml 생성
vi ingress-service.yaml
//
apiVersion: v1
kind: Service
metadata:
  name: nginx-ingress-controller-svc
  namespace: ingress-nginx
spec:
  ports:
  - name: http
    protocol: TCP
    port: 80
    targetPort: 80
  - name: https
    protocol: TCP
    port: 443
    targetPort: 443
  selector:
    app.kubernetes.io/name: ingress-nginx    # nginx 컨트롤러
  type: LoadBalancer
  externalIPs:
  - 192.168.2.95    # master1의 아이피
//

# kubectl apply -f ingress-service.yaml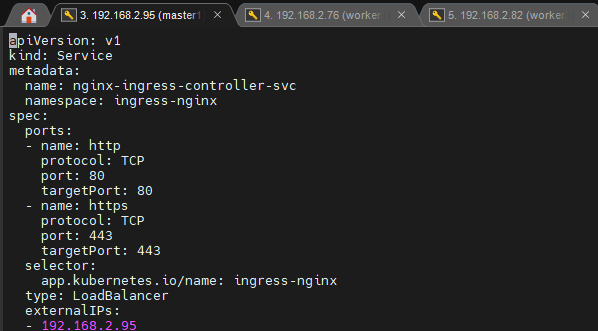


metallb
metallb 사용
# metallb.yaml 수정 (기존 이미지가 존재하지 않기 때문)
vi /root/_Book_k8sInfra/ch3/3.3.4/metallb.yaml
//
        image: 192.168.1.158:5000/metallb-speaker:0.9.3
//
        image: 192.168.1.158:5000/metallb-controller:0.9.3
//

# 도커 이미지를(speaker, controller) 내려받고 사설 레지스트리에 업로드
docker pull bitnami/metallb-speaker:0.9.3
docker pull bitnami/metallb-controller:0.9.3
docker tag bitnami/metallb-speaker:0.9.3 192.168.1.158:5000/metallb-speaker:0.9.3
docker push 192.168.1.158:5000/metallb-speaker:0.9.3
docker tag bitnami/metallb-controller:0.9.3 192.168.1.158:5000/metallb-controller:0.9.3
docker push 192.168.1.158:5000/metallb-controller:0.9.3

# 위에서 받아놨던 yaml 파일 적용
cd
kubectl apply -f /root/_Book_k8sInfra/ch3/3.3.4/metallb.yaml

# metallb-l2config.yaml 생성
vi metallb-l2config.yaml
//
apiVersion: v1
kind: ConfigMap
metadata:
  namespace: metallb-system
  name: config
data:
  config: |
    address-pools:
    - name: nginx-ip-range
      protocol: layer2
      addresses:
      - 192.168.2.95    # 마스터1
      - 192.168.2.76    # 워커1
      - 192.168.2.82    # 워커2
//

# kubectl apply -f metallb-l2config.yaml
# kubectl describe configmaps -n metallb-system


# metallb-test.yaml 생성
vi metallb-test.yaml
//
apiVersion: v1
kind: Pod
metadata:
  name: nginx-pod
  labels:
    app: nginx-pod
spec:
  containers:
  - name: nginx-pod-container
    image: 192.168.1.158:5000/nginx:latest
---
apiVersion: v1
kind: Service
metadata:
  name: loadbalancer-service-pod
spec:
  type: LoadBalancer
#  externalIPs:
#  -
  selector:
    app: nginx-pod
  ports:
  - protocol: TCP
    port: 80
    targetPort: 80
//

# kubectl apply -f metallb-test.yaml


# 이름을 다르게 하면 하나 더 배포할 수 있다
cp metallb-test.yaml metallb-test1.yaml

# vi metallb-test1.yaml
//
apiVersion: v1
kind: Pod
metadata:
  name: nginx-pod1
  labels:
    app: nginx-pod1
spec:
  containers:
  - name: nginx-pod-container1
    image: 192.168.1.158:5000/nginx:latest
---
apiVersion: v1
kind: Service
metadata:
  name: loadbalancer-service-pod1
spec:
  type: LoadBalancer
#  externalIPs:
#  -
  selector:
    app: nginx-pod1
  ports:
  - protocol: TCP
    port: 80
    targetPort: 80
//

# kubectl apply -f metallb-test1.yaml


Volume
Volume 관리
컨테이너 내의 디스크에 있는 파일은 임시적이며, 컨테이너에서 실행될 때 애플리케이션에 적지 않은 몇 가지 문제가 발생한다.
한 가지 문제는 컨테이너가 크래시될 때 파일이 손실된다는 것이다. kubelet은 컨테이너를 다시 시작하지만 초기화된 상태이다.
두 번째 문제는 Pod에서 같이 실행되는 컨테이너 간에 파일을 공유할 때 발생한다.
쿠버네티스는 다양한 유형의 불륨을 지원한다. 파드는 여러 불륨 유형을 동시에 사용할 수 있다. 임시 볼륨 유형은 파드의 수명을 갖지만, 퍼시스턴트 볼륨은 파드의 수명을 넘어 존재한다.

pv(Persistent Volume) / pvc
# 폴더 생성 후 이동
cd
mkdir volume && cd $_

# pv-pvc-pod.yaml 생성
vi pv-pvc-pod.yaml
//
apiVersion: v1
kind: PersistentVolume
metadata:
  name: task-pv-volume
  labels:
    type: local
spec:
  storageClassName: manual
  capacity:
    storage: 10Mi    # 10MB
  accessModes:
    - ReadWriteOnce    # ReadWriteOnce(RWO) : 하나의 노드가 볼륨을 Read/Write 가능하도록 마운트
  hostPath:
    path: "/mnt/data"
---
apiVersion: v1
kind: PersistentVolumeClaim
metadata:
  name: task-pv-claim
spec:
  storageClassName: manual
  accessModes:
    - ReadWriteOnce
  resources:
    requests:
      storage: 1Mi    # PV에 1MB만큼 요구

  selector:
    matchLabels:
      type: local    # PV의 라벨
---
apiVersion: v1
kind: Pod
metadata:
  name: task-pv-pod
  labels:
    app: task-pv-pod
spec:
  volumes:
    - name: task-pv-storage
      persistentVolumeClaim:
        claimName: task-pv-claim    #PVC의 이름
  containers:
    - name: task-pv-container
      image: 192.168.1.158:5000/nginx:latest
      ports:
        - containerPort: 80
          name: "http-server"
      volumeMounts:
        - mountPath: "/usr/share/nginx/html"
          name: task-pv-storage
//
# 라벨 확인
kubectl get svc -o wide
kubectl get po --show-labels
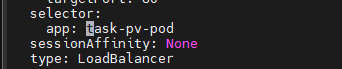
# 라벨 수정
kubectl edit svc loadbalancer-service-pod
//
app: task-pv-pod
//
## worker1에서
# 마운트 폴더가 잘 만들어졌는지 확인
ls /mnt/data/

# 테스트를 위해 마운트된 폴더에 index.html 파일 생성
echo "HELLO" > /mnt/data/index.html

## master1에서
# task-pv-pod에 80포트의 노드 포트 부여 (현재 서비스가 없으므로)
kubectl expose pod task-pv-pod --name nodeport --type=NodePort --port 80

## 마운트된 폴더에 파일이 생겼으니, 파드가 지워져도 남아야한다.
# task-pv-pod 삭제
kubectl delete pod task-pv-pod

## worker1에서
# 마운트 폴더에 파일이 그대로 잇는지 확인
ls /mnt/data/

## master1에서 파드만 생성하는 템플릿 새로 생성
vi task-pv-pod.yaml
//
apiVersion: v1
kind: Pod
metadata:
  name: task-pv-pod
  labels:
    app: task-pv-pod
spec:
  volumes:
    - name: task-pv-storage
      persistentVolumeClaim:
        claimName: task-pv-claim    #PVC의 이름
  containers:
    - name: task-pv-container
      image: 192.168.1.158:5000/nginx:latest
      ports:
        - containerPort: 80
          name: "http-server"
      volumeMounts:
        - mountPath: "/usr/share/nginx/html"
          name: task-pv-storage
//

# 템플릿 적용
kubectl apply -f task-pv-pod.yaml

# pv, pvc 정보 확인
kubectl get pv,pvc

RECLAIM POLICY가 "Retain"인 경우에는 PVC가 지워져도 PV의 데이터들을 남기지만, "Delete"인 경우네는 같이 사라진다.
STATUS가 "BOUND"인 경우는 잘 연결된 상태이다.
## 확인을 위해 pvc를 삭제

# protection 해제
kubectl patch pvc task-pv-claim -p '{"metadata":{"finalizers":null}}'

# pvc 삭제
kubectl delete pvc task-pv-claim
'메가존 클라우드 2기 교육 > 실무 특화' 카테고리의 다른 글
| Kubernetes - 스케줄링(taint & toleration, cordon , drain), (0) | 2023.06.07 |
|---|---|
| Kubernetes - NFS, configMap, namepsace, ResourceQuota (0) | 2023.06.05 |
| Kubernetes - CLI, 템플릿, 멀티 노드, 멀티 컨테이너 (0) | 2023.06.01 |
| Kubernetes - 미니큐브 CLI, 템플릿, 롤링 업데이트 제어 (0) | 2023.05.31 |
| Docker - AWS ECS (0) | 2023.05.29 |


